Build your own Custom URL Shortener with ease
With Cloudflare Worker + GitHub Actions

A Student and Full Stack Web Developer from India with a immense knowledge of DevOps and experience in Backend APIs. Loves to contribute to Open Source.
Hey Fellas,
This is my First Blog. Hope you all love it.
You all must have used and heard about of bit.ly, tinyurl.com, goo.gl, etc. and often seen many websites and apps providing you short-links like t.co/xxxxx (Twitter), epi.gm/xxxx (Epic Games), etc.
When I saw them, I was very curious about them and wanted to have something of my own (it looks cool, seriously ...) .
Use Case (Example)
https://go.url.me/ --> Our Base URL
https://go.url.me/github --> Link to your GitHub profile
https://go.url.me/discord --> Discord Server Invite Link
https://go.url.me/yt --> Link to you Youtube Channel
https://go.url.me/xxxx --> What ever you want ......
(Look Cool Right ...)
Let me show you how to have one of your own
Getting Started
Prerequisites
- A CloudFlare Account with a Doamin (Free Plan or higher)
- GitHub Account
- Basic Knowledge of GitHub Actions
- Wrangler CLI
- Basic or Intermediate knowledge or JavaScript and CLI usage

Concepts and Ideology
- We are going to use Wrangler to create a URL Shortener Application
- Our app is a serverless application
- We are using JSON as our primary database for storing links and it's short names
- We are storing our App as a project on GitHub
- We are going to use GitHub Action to deploy our app
- We are deploying to CloudFlare Workers
- CloudFlare workers hosts our application 24/7 for free. (limitation apply)
Phase 1 :-
Create a Cloudflare account. (If you don't have one)
Install Wrangler CLI
npm i @cloudflare/wrangler -gCreate a new Wrangler App using Template
wrangler generate <your-project-name> https://github.com/BRAVO68WEB/url-short-cfwOutput :-
Creating project called `bravo68web`...
Error:  Error replacing placeholders `E:\CFW\bravo68web\.github\workflows\cfw.js.yml`
Info: caused by liquid: Unknown variable
with:
 requested variable=secrets
 available variables=authors, crate_name, project-name
Error: tried running command:
cmd /C C:\\Users\\Administrator\\AppData\\Local\\.wrangler\\cargo-generate-0.5.0\\cargo-generate.exe generate --git https://github.com/BRAVO68WEB/url-short-cfw --name bravo68web --force
exited with exit code: 1
(You may ignore these)
Open Your Project directory in you preferred code editor
cd your-project-name
code .
Configure Wrangler for your project
wrangler configOutput :-
╭──────────────────────────────────────────────────────────────────────────────────────────────────────╮ │ │ │ To find your API Token, go to https://dash.cloudflare.com/profile/api-tokens │ │ and create it using the "Edit Cloudflare Workers" template. │ │ │ │ Consider using `wrangler login` which only requires your Cloudflare username and password. │ │ │ │ If you are trying to use your Global API Key instead of an API Token │ │ (Not Recommended), run `wrangler config --api-key`. │ │ │ ╰──────────────────────────────────────────────────────────────────────────────────────────────────────╯ Enter API Token: xxxxxxxxxxxxxxxxxxxxxxxxxxxxxxxxxxxxxxxxxxxxxxxxxxxx Validating credentials... Successfully configured. You can find your configuration file at: C:\Users\Administrator\.wrangler\config\default.toml- 5.a Visit Here to get your access token
- 5.b Click Create Token
- 5.c Click Use Template besides "Edit CloudFlare Workers"
- 5.d Under "Account Resources" select your account name.
- 5.e Under "Zone Resources" select "All Zones"
- 5.f Under "TTL" only select the Start Date and then select Current Date
- 5.g Click on Continue to Summary
- 5.h Click Create Token
- 5.i Copy the New Generated Token
NOTE
Copy this token somewhere as you will need it again in further steps
- Paste this access token in our terminal to configure wrangler successfully
Phase 2 :-
- Open
urls.json, which acts as a static database to store short-link names with respective URLs. Edit it as below .
{
     "github": "https://github.com/xxxxxx",
     "yt": "https://youtube.com/watch?v=xxxxxxxxxxx",
     "discord": "https://discord.gg/XXXXXXX",
     "XXXXX": "https://xxxxxxxxxx.xyz",
     .
     .
     .
}
Now, try to run your application to test whether it works or not.
wrangler devAfter code is build successfully, try to open it browser.
http://localhost:8787/Output :-
404 not found !! Check all possible at
urls.json
Now, try to open any short link with it's name from that given in
urls.jsonin your browser.. . "test": "https://google.com", . .http://localhost:8787/testThis should redirect you to
https://google.com
If you are redirected to Google Homepage or what URL you have given, Congrats, 👍 it works
Now, Its's Time to Deploy
Phase 3 :-
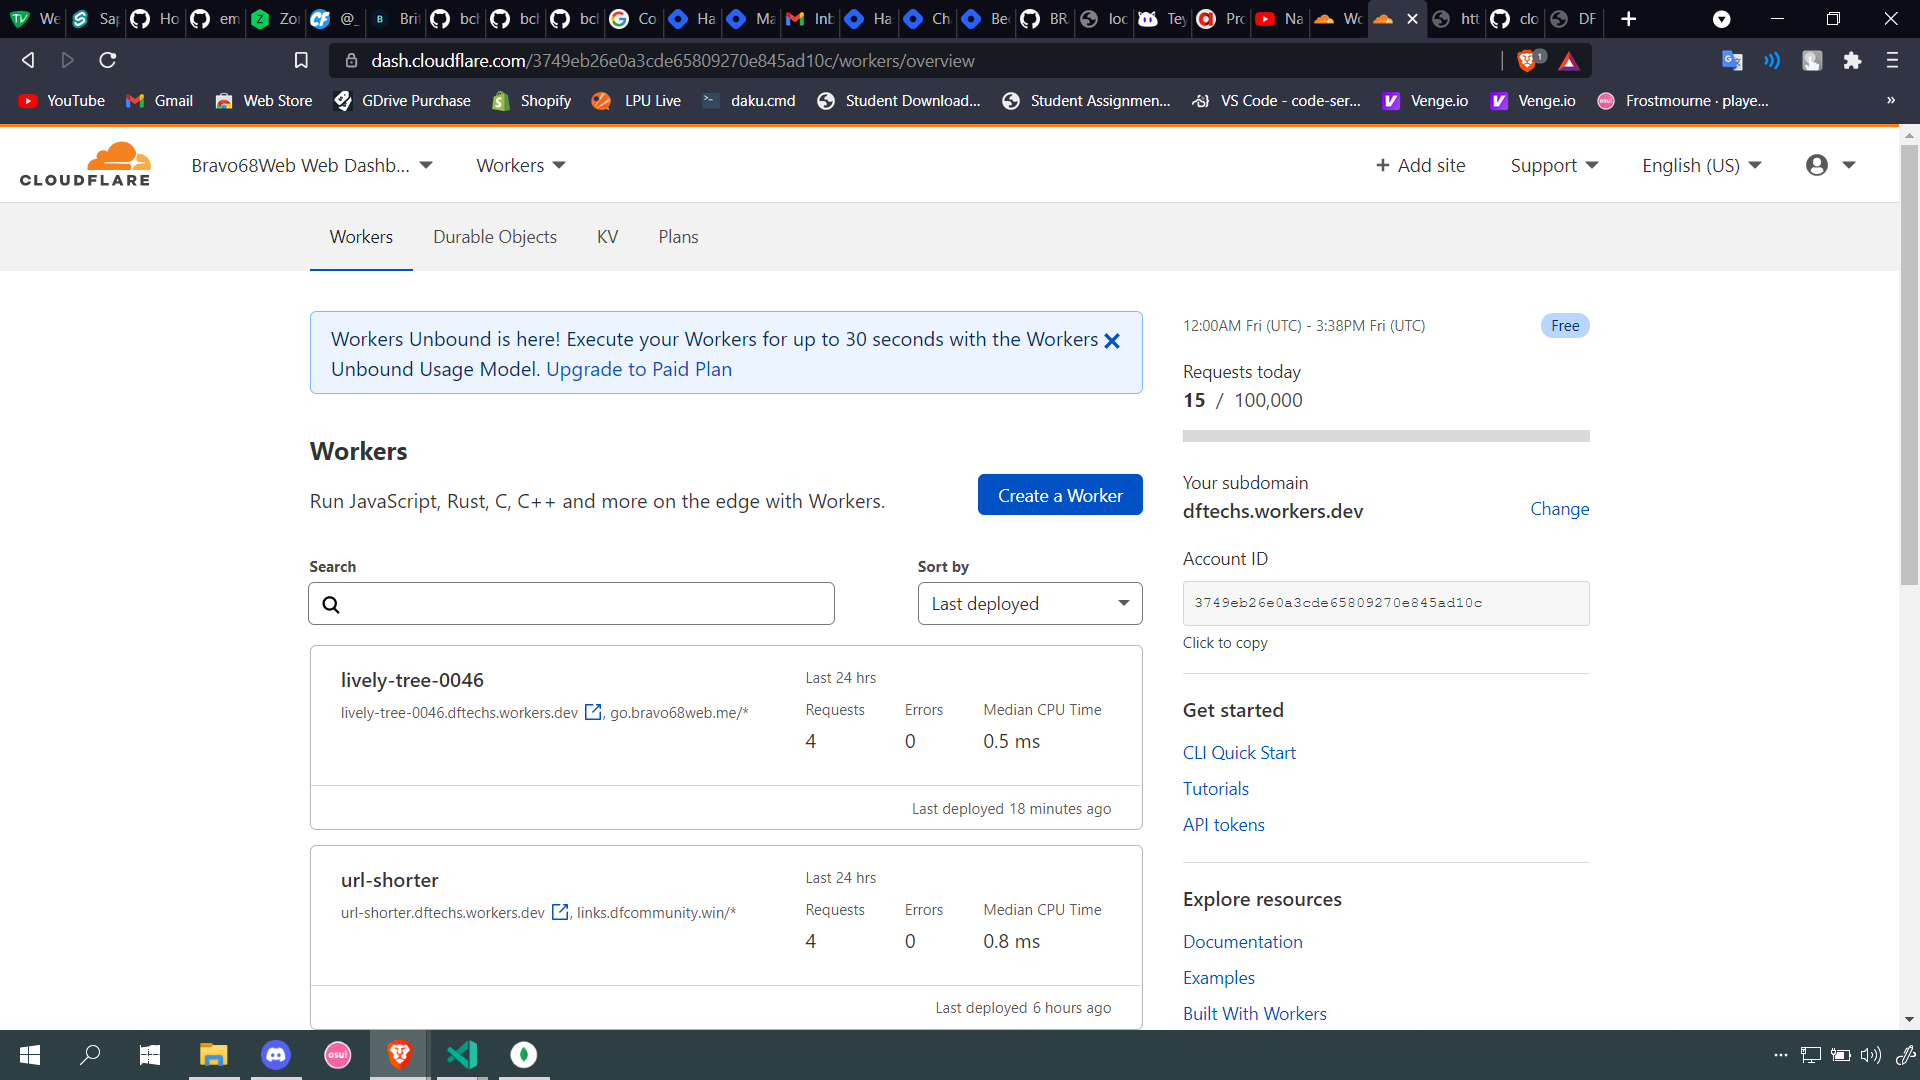
- Open CloudFlare Dashboard, open your Account, and open Workers from bottom right of the screen.
- Now enter any name of your choice, (for example, GitHub username) and click Set Up
- Choose "Free Plan" and click Continue with Free
- Create a Empty worker by clicking Create a Worker
- Don't change anything and click on Save and Deploy
- Now go back to previous window, where you clicked on "Create a Worker"
- Now Copy "Account ID", "Worker Name" and "Worker URL" ( like *.yourname.worker.dev) keep it with you.
- Open Your Domain's overview page. Copy "Zone ID" from bottom right of the window and keep it with you.
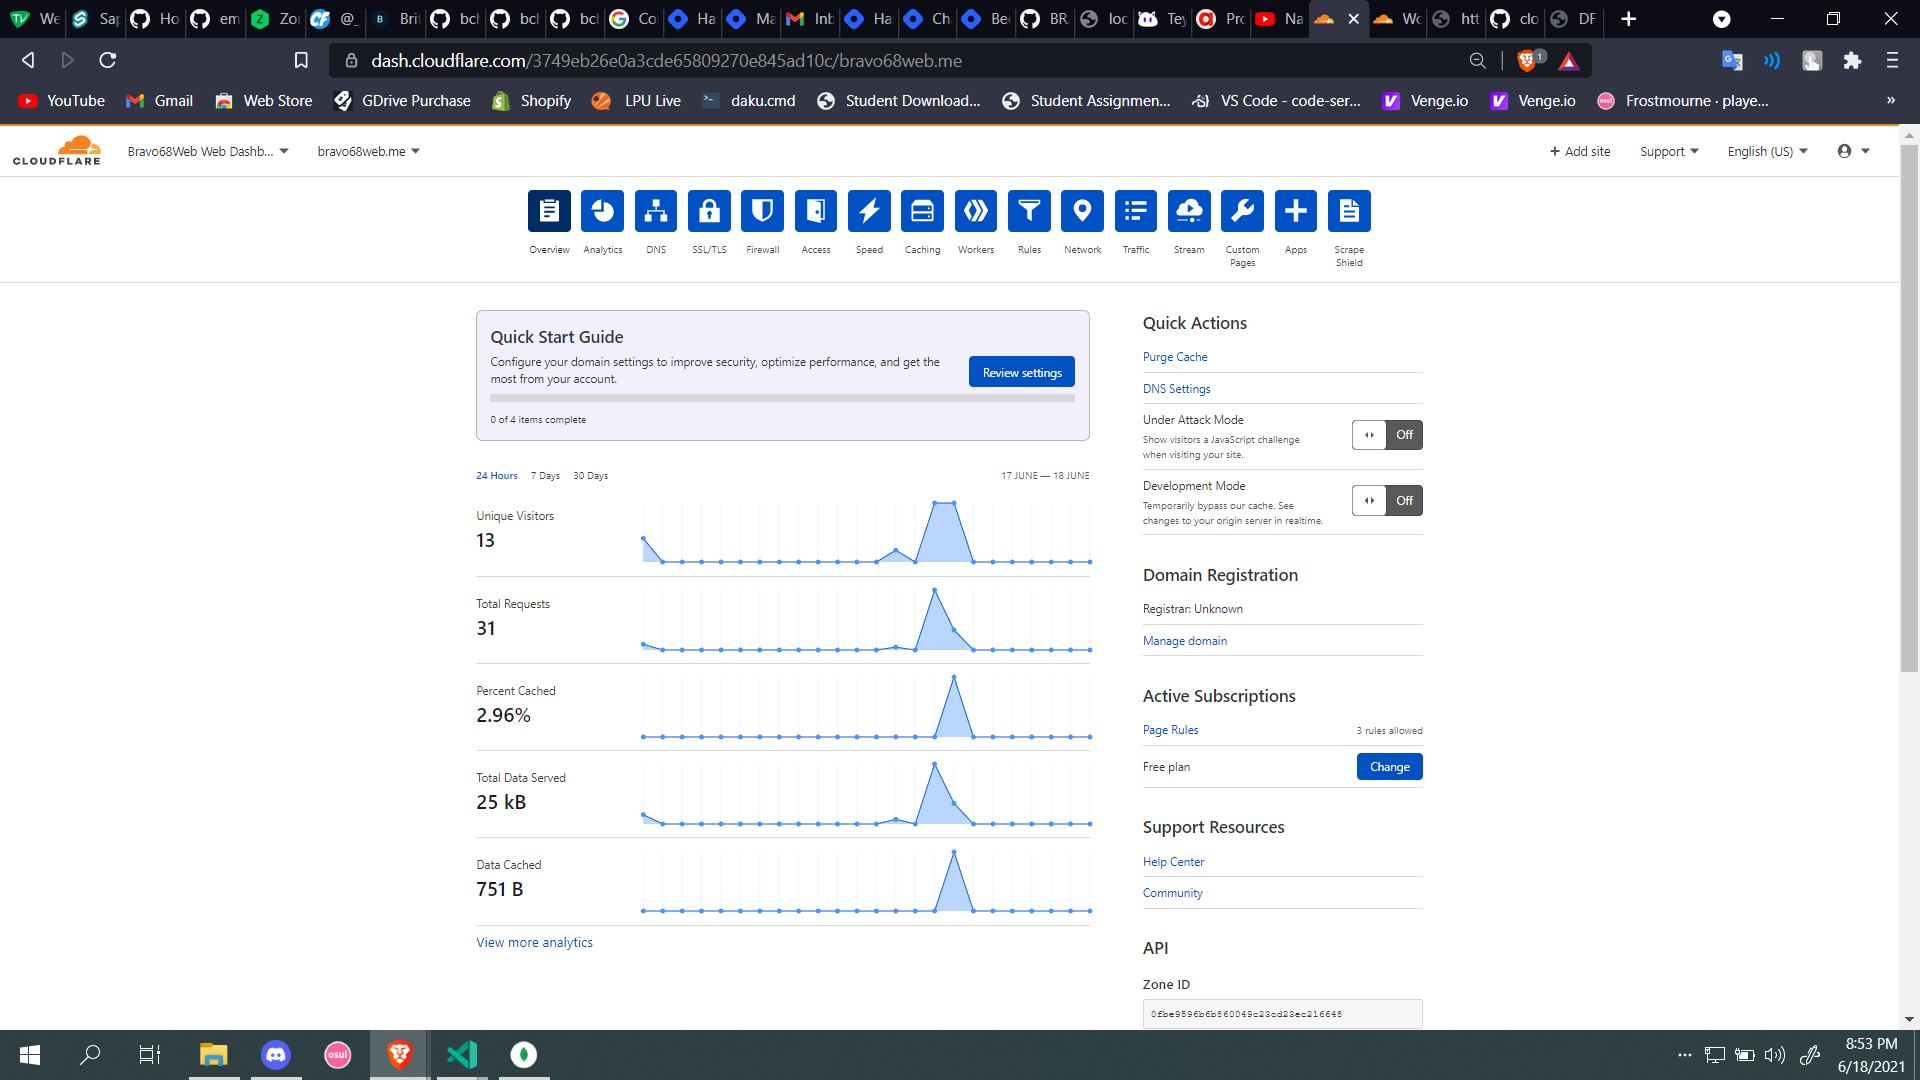
Open DNS settings and Create CNAME with name of your choice (like "go" for https://go.bravo68web.me/xxxxxx/ ") and value as Worker URL
Open
wrangler.tomland edit as belowname = "<worker-name>" type = "webpack" account_id = "<account-id>" workers_dev = false route = "<subdomain.domina.id>/*" zone_id = "<your-zone-id>"- Save the
wrangler.tomland publishwrangler publish
Now visit your https://subdomain.domain.id/xxxxx and test it.
If still everything is going good, Well Done !!!! 👍
Phase 4 :-
Final Step is automation :)
- Open ".github\workflows\cfw.js.yaml" file
- Uncomment the entire code
- Replace your CloudFlare Access Token from Phase 1 : Step 5 with in the last line.
- Create a private repository in GitHub and push your code their
- Wait for GitHub actions to complete and that's it !!
You have successfully deployed you application. Now, whenever you need to add new URLs, just edit "urls.json" and push the code back to GitHub to Auto Deploy
I hope you enjoyed it !!
Thanks for Reading till the end ...
😺😺😺 Cya Soon ❤....